Showing posts with label olive oil. Show all posts

Monday, June 17, 2013

Surprising Summer Salad: Watermelon and Feta!


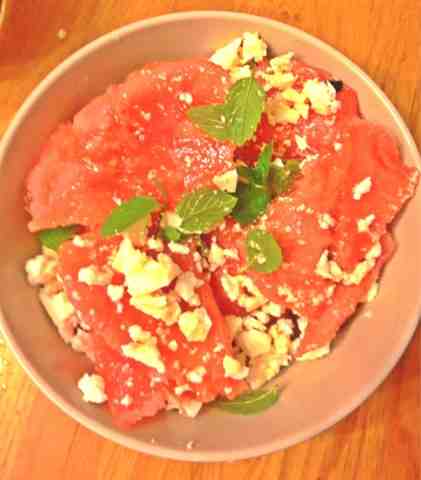
Trust me, this sounded weird to me too. Watermelon and feta?! Really?! I had never had watermelon in any kind of savory context. Having both ingredients in the fridge, I decided to experiment. Why the hell not?


An unexpected combination results in a refreshing and totally delicious salad!

The result was way beyond expectations -- absolutely delicious. Refreshing. New. Incredible. The salty and creamy crumbly feta brought out the sweetness of the watermelon in new ways. I added a few mint leaves from my little window garden and a drizzle of olive oil and voila -- added layers of complexity and flavor in what is definitely going to become one of my summer staples.

I came back from work feeling hot and tired the other day and just made a new batch in minutes, scooping chunks of watermelon with a spoon straight into the bowl, crumbling the feta over it with my hands and adding the mint leaves and olive oil. I also tried a bit of balsamic vinegar the second time and that tastes wonderful too -- I can't wait to try a bit of lemon juice... I had a quick, healthy and refreshing snack in no-time and it felt so sophisticated too! 

I hope to play around with this recipe some more this summer, as the possibilities seem endless...

Monday, May 13, 2013

Gourmet Salad with Mango

This is my first salad creation of the summer, and a follow-up on my post about the 5 rules for making a full meal of your salad!

My salad consists of some lettuce from my very own roof-top veggie garden, and the usual culprits: ripe tomatoes and carrots. But the extra protein and fruit I added are what really made it special!


Color:
The bright summer colors did a lot to make this salad visually appealing and beautiful!


Protein:
I added a mix of walnuts and almonds as my protein #1, and cubes of feta cheese as protein #2.

Fruit:
I added juicy, ripe mango as my fruit -- it added an unexpected sweetness to this savory salad and balanced out the salty feta cheese really well!

Texture:
Crispy fresh lettuce, juicy soft mango, the crunch of the nuts and the dry crumbliness of the feta made for a great variety of textures that kept this salad interesting and exciting!

Homemade Dressing:
I made a simple oil and vinegar dressing for this salad, but the key was using balsamic vinegar. This type of vinegar has a natural sweetness that went really well with the mango flavors and really enriched the salad!


This colorful salad had enough variety to make for a full meal, and the protein kept me sated even though it was all relatively light.

Let me know if you have experimented with any delicious salad combos of your own! Post comments and recipe suggestions in below and I will be sure to follow up. Happy eating!

Saturday, May 11, 2013

5 Rules for Making a Full Meal of Your Salad

The season of long days and steamy nights is inching nearer, and with atmospheric CO2 levels at a 3-million-year high, I suspect it'll be a hot one! Nothing better than a light, refreshing salad to keep you cool as a cucumber, and able to show off your sexy summer body guilt-free. But often, eating a salad sounds boring and you end up having the same old lettuce-tomato-carrot combo that leaves you dreaming of those sexy gourmet salads at your favorite bistro or restaurant...

Fear not! Your days of boring salads are over if you just follow these 5 simple rules that allow you to mix and match to create your own gourmet dish from both fresh ingredients and things that may be lying around in your pantry or refrigerator. Your favorite salad can go from midsummer night's dream to reality in minutes!

Begin with your favorite base of greens and veggies, whatever is in season and looks beautiful in the market stalls. Summer is a great time for tomatoes, peppers, and all sorts of colorful produce -- be adventurous! Once you have your favorite veggies together, time to take it to the next level!

RULE #1: PLAY WITH COLOR


Make your salad visually appealing by making sure to mix and match different colors on your plate. This will also ensure that you hit upon different nutrients and minerals in your dish, something really important if you are trying to make a meal of it. Dark and light greens, plump ripe tomatoes in red, yellow and orange, crunchy carrots, bell peppers of different colors, the purple pink of red onions, black olives, etc. -- make it a rainbow and try to get at least 5 different colors in your bowl!

RULE #2: ADD SOME PROTEIN

Play with different protein combos for the variety of textures they add -- more on this later!

Protein will keep you full for longer and adds an important nutritional component to any salad. Different protein types to choose from include:

Seeds and Nuts:

  • Almonds
  • Walnuts
  • Sunflower seeds, etc.


Dairy/Cheeses:

  • Feta
  • Brie
  • Parmesan
  • Plain/Greek yoghurt


Meat or Meat Substitutes:

  • Smoked Salmon, Turkey Breast, Ham etc.
  • Grilled Chicken or Steak
  • Boiled Egg
  • Tofu


Protein-Rich Grains:

  • Beans/Lentils
  • Quinoa etc.


As a general rule, try to include at least one ingredient from any 2 of these protein groups to make your salad rich in nutrients and vary the kinds of protein you are eating!


RULE #3: ADD A FRUIT!
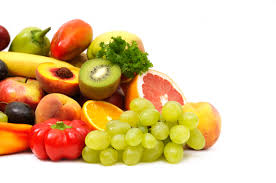
Go beyond what you imagine is acceptable in a salad -- you won't regret it!

This is a secret that can really separate a gourmet salad from a plain one -- a little bit of fruit! Of course I am not counting tomatoes here, since we are used to eating them savory. So think beyond tomatoes and the usual raisins/Craisins, avocado (though I love avocado) and apples/pears. Summer is full of bright colorful fruits that will add a truly delicate touch to your salad, and a burst of color/flavor. Try to get creative with berries (like strawberries or blueberries), citrus fruits like grapefruit and oranges, and summer fruits like grapes, mango or peach! Since they can be pretty intense, I would not recommend adding more than 1 fruit flavor to your salad.

RULE #4: PLAY WITH TEXTURE

Beyond the visual appeal of a colorful salad, think about combining different textures to create something that appeals to your sense of touch as well! Combine a soft, juicy fruit like mango with dry crunchy nuts, or a crumbly cheese like feta with the satisfying pop of blueberries or grapes to create interesting sensory experiences with your food!

RULE #5: MAKE YOUR OWN DRESSING

For the healthiest and most flavorful salad dressings, nothing is a good substitute for plain old salt, pepper (to taste) and extra virgin olive oil. The stuff you buy in the store is filled with bad oils (even when it says it's made with olive oil, read the ingredients!! I don't know who allows manufacturers to lie on these bottles!) and emulsifiers that keep the ingredients from separating.

For the most part, I personally am a fan of plain old olive oil and vinegar. Sometimes, a bit of mustard or yoghurt is more than enough flavor for my salads. But if you are still adjusting your palatte to the taste of veggies on their own, some of these extras might help.

Beyond these basic ingredients, you simply need to add an acid and any other things you love. Here are some ideas:

Acids:

  • A vinegar (balsamic, apple cider, red/white wine all work -- experiment, and try to match it to your salad!)
  • Lime or lemon juice (freshly squeezed over your salad for the lightest and most refreshing flavors!)


Something creamy:

  • A bit of mustard (dijon is delicate and delicious if your salad has meat in it!)
  • A dollop of yoghurt (my preferred mayo substitute, it is healthier and very flavorful!)


Extra Flavor:

  • Minced garlic (can be great on more intense/spicy salads)
  • Fresh or dry chilli peppers (I'm thinking of Thai papaya salad!)
  • Anchovies or olives for the extra intense saltiness
  • Honey (a tiny bit can go into creating your own honey-mustard variations)
  • Fresh herbs like cilantro, mint, fennel, etc. can add a punch of fresh flavor!
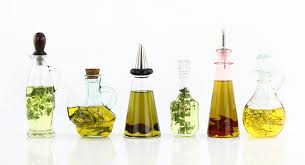

Get creative with your own healthy dressings!

Now that you know these basic rules, experiment and mix it up to create the most amazing salads this summer! I will be posting some of my own creations throughout the season -- stay posted!


Thursday, May 9, 2013

Roasted Veggies Day 3: veggies with a side of rice

A quickie -- I did not much time to prep or think of a proper meal this morning, so I just served the veggies with a side of rice snug into my Bento box and ready to take to work! My husband had conveniently cooked some extra rice the evening before, so it was waiting for me in the fridge in the morning.

My Bento Box, packed and ready for lunch!

It was a nice, light lunch and heated in the microwave, with a little drizzle of olive oil, made for a delicious way to get me through the day!

Sunday, May 5, 2013

Roasted Veggies: Getting my raw materials ready for the week!

How to eat healthy, homemade food, save time and not end up with soggy rotten veggies in your fridge at the end of the week?

I have blogged before about prepping veggies in advance for the week. It ensures that even when you are dog tired and don't feel like cooking at the end of a long day, you can still eat something delicious and healthy at home!

This week I bought a bunch of veggies at the market on my day off and got them all ready in no time by using the oven to roast them. The advantage over other kinds of cooking is a) the flavor and versatility of roasted veggies and b) the fact that you are free to read, blog, nap or watch cat videos on YouTube while your veggies cook!

Veggies all chopped up and ready to be seasoned in the bowl!


Fresh ingredients this week:

  • 1 zucchini
  • 1 eggplant
  • 2 tomatoes
  • 1 red onion
  • 1 red bell pepper
  • 1 carrot
  • 5 cloves of garlic


Other ingredients:

  • Sea Salt
  • Black pepper
  • Dry Thyme
  • Olive Oil


Before cooking, the seasoned veggies are all spread out on a baking sheet/pan.


Instructions:

  • Preheat the oven to 200 degrees Celsius
  • Wash and chop the veggies -- I sliced the eggplant and carrot into rounds, quartered the onion and tomatoes, cut the bell pepper into thick strips and left the garlic cloves whole, with the skins on. The zucchini was chopped into bite-sized cubes.
  • Put all the chopped veggies in a large bowl.
  • Add salt and pepper to taste, sprinkle some thyme and add a few lugs of olive oil.
  • Toss to coat.
  • Spread onto a baking tray.
  • Pop into the oven for 45min. or so. Go do something fun.


These ingredients are to be transformed throughout the week into delicious meals, different every time so you don't get bored. Stay tuned!


Cooked and ready to be transformed into any delicious meal!


Wednesday, March 6, 2013

Steamed Veggies for a Week of Healthy Eating

I spent a few hours on the weekend chopping, washing and steaming a bunch of veggies, including squash, onions, garlic, spinach, cauliflower and broccoli. I also made a good portion of whole rice mixed with barley to keep in my fridge, and defrosted some black beans i had cooked a while back. I have talked before about how my busy schedule makes it hard for me to cook during the week, and I have found that washing and cooking the veggies in advance helps me eat home cooked meals throughout the week!

Reimagining the veggies and creating dishes with them later in the week is fast and easy! A bit of vegetable broth and I have soup, a few spices and I have curry, a blender and I have a dip or purée to eat with chips or pita...

This pic is of the veggies eaten pretty much straight up, with some salt, a squeeze of fresh lemon juice and some olive oil! Yum!


Saturday, February 2, 2013

Creative Pasta with Leftovers

A dinner I whipped up quickly with just a few ingredients I had lying around in the fridge!

While the water boiled for the pasta, I put a handful of pine nuts in a small frying pan and roasted them until they were lightly golden. I diced up some sun dried tomatoes, some black olives, combined them with the roasted pine nuts and added some garlicky sautéed spinach I had in the fridge.

Some salt, pepper, a few glues of olive oil and freshly grated Parmesan made this a great quick dinner with a gourmet feel!


Friday, November 23, 2012

Jamie Oliver's Lamb Racks (minus the racks...)

So I was excited to try a new tasty tray bake ala Jamie Oliver and I got together all the ingredients, except the main one -- the lamb racks! Turns out only one person in my local market sells lamb meat, and she was all out of ribs... So I just had to settle for some part of the upper leg that looked like it woud to well roasted...

It turned out pretty delicious, with the roasted veggies and fresh mint sauce drizzled on top! Better still, it made the house smell delicious as promised, while Jiahui and I watched a movie together :D

I doubled Jamie's recipe because I realized his portions are pretty small, and I intended to have leftovers to take to work...

Ingredients:
2 racks of lamb (just a big piece of meat in my case...)
1lb. baby white potatoes (these were one of the highlights of the dish!)
3 red bell peppers
2 zucchini
7oz. cherry tomatoes
8 cloves garlic
1/2 cup kalamata olives
1 medium sprig rosemary
1 small bunch mint
white sugar (Jamie said "superfine" but I just used regular and it was fine...)
red wine vinegar
white wine vinegar
extra virgin olive oil
sea salt
pepper to taste

The Steps:

  1. Preheat the oven to 190 Celsius, boil the kettle
  2. Wash and scrub the baby potatoes. Cut any large ones in half and place in a saucepan. Add a pinch of salt and cover with boiling water from the kettle.
  3. Place the pan on high heat and bring back to a boil. Reduce heat to medium and boil for 5min. Meanwhile...
  4. Halve, deseed and roughly chop the bell peppers. Crush unpeeled garlic cloves with the heel of your hand. Crush the olives and discard pits.
  5. When the potatoes have had 5min, drain them and transfer to a roasting pan. Add the chopped pepper, crushed garlic and olives.
  6. Drizzle everything with olive oil, add a pinch of salt and pepper, and toss to coat. Cook in the hot oven for 30min, or until the veggies are soft and tender and beginning to turn golden. Meanwhile...
  7. Score the fat on the lamb in a criss-cross fashion. Sprinkle with a pinch of salt and pepper and add a small drizzle of olive oil. Rub the seasoning into the meat.
  8. Top and tail the zucchini and cut into 1cm thick slices. Pick the rosemary leaves, discard the stalks.
  9. When the vegetables have had 30min, remove the tray from the oven, add te zucchini, rosemary leaves and tomatoes. Add a splash more oil if needed, gently toss and return to the oven.
  10. Place the pan back in the oven then put the lamb directly on the oven shelf above the pan -- the delicious juices from the roasting lamb fall onto the veggies, giving them a delicious flavor!
  11. Jaime says to cook for 15-20min but my piece of lamb took almost 30min... Meanwhile...
  12. Pick and finely chop the mint leaves, discard the stalks. Put the sugar in a bowl and add a tablespoon of hot water. Stir until the sugar is dissolved.
  13. Add the mint leaves to the bowl along with the white wine vinegar and extra virgin olive oil. Stir everything together and pop in the refrigerator until needed.
  14. When the lamb is done, transfer it to a plate, cover with aluminum foil and leave to rest for 5min. 
  15. Sprinkle the red wine vinegar over the roasted vegetables and return to the oven for a final 5min.
  16. When the lamb is rested, divide into portions and serve with a good helping of roasted vegetables and a spoonful or two of the mint sauce.


The Verdict!

This dish was delicious, and the smell of it cooking was pure torture! It smelled so good, and the whole house smelled awesome. The lamb was pinkish on the inside and done well, but the cut I bought wasn't the best I don't think, and it was a little tough. The mint sauce was a great complement though, and it was definitely edible! The highlight though, was the veggies. They were so flavorful, and perfectly done. The little potatoes were amazing, soft and juicy. I think boiling them before putting them in the oven really helps them retain some moisture, and that's a trick I will be using in the future!

The leftovers were delicious reheated or cold, and I took them to the office in the form of a sandwich as  well -- delicious with some added cheese, and plenty of the veggie gravy/sauce added to it for moisture. Yum!

Will definitely try this again, preferably with the actual lamb racks next time!


Sunday, September 9, 2012

Roasted Bell Peppers (the stuffed of legend!)

My dinner tonight was divine if I should say so myself...

I have made stuffed bell peppers myself before, mostly intuitively, putting in them rice, veggies, and anything else I found lying around. But tonight was different. Against my better judgment, I followed a recipe by Jamie Oliver after downloading his app, Jamie's Recipes for the iPhone. Now, I say against my better judgment not because I do not like Jamie Oliver but because I do not like recipes, nor do I ever really follow them. But I decided to download Jamie's app because it has good reviews, I have seen and enjoyed hi TV shows, and his app has a whole recipe package for tray bakes, my favorite way of cooking!

The finished product looked colorful and was absolutely delicious!
I love tray bakes because, in Jamie's words, "it's basically just an assembly job." Yes, I enjoy throwing things together and then just allowing the oven to do its thing while I do my thing. That's what cooking reluctantly is all about!

So anyways, the point is, Jamie's recipe was pretty mind-blowing. It was absolutely DELICIOUS and I  kind of felt sad that no one was around to share it with me, but happy it worked out and I can maybe impress some friends with this sometime. I don't usually cook for others when I am trying to make something for the first time... takes the pressure off ;)

These were the ingredients:

  • 1 Red Bell Pepper
  • 1 Yellow Bell Pepper
  • 1 Ripe Tomato
  • 1 Eggplant (Jamie's recipe said 1/2 but Chinese eggplants are so small... plus, what the hell am I going to do with half an eggplant in my fridge?!)
  • 1 Red Onion
  • 1/2 Head of Garlic
  • Fresh Parsley, Mint and Thyme
  • Lemon
  • 1/2 Tablespoon Coriander seeds
  • Kalamata Olives (I just used regular black olives in mine)
  • Sun-dried tomatos
  • 100g. (about 4 oz.) Feta Cheese
  • Pine Nuts
  • 1/3 cup of couscous
  • 1/2 cup of chicken broth (Jamie says vegetable, but I was out!)
  • Salt & Pepper to Taste
  • Olive Oil 


Beautiful, fresh ingredients just for me :)

  1. I chopped up the zucchini and eggplant into bite-sized pieces. I quartered the tomato and peeled half of the onion, cutting it into wedges. I put all these ingredients straight onto the roasting pan.
  2. I picked the thyme leaves off the stems and discarded the stems. Then I ground up the coriander seeds using the mortar and pestle, separated the garlic cloves from each other, leaving the skins on, and setting 2 of the garlic cloves aside for later. I added the thyme, coriander and garlic cloves to the veggies on the roasting pan, added some salt, pepper, and a few glugs of olive oil and mixed everything up so the veggies were all evenly coated. I set this aside.
  3. I preheated the oven to around 200 degrees Celsius (400 Fahrenheit). Meanwhile, I put the pine nuts in a non-stick frying pan over medium heat and moved them around until they were a nice golden brown (just a couple minutes).
  4. I heated up the chicken broth in a saucepan and added it to the couscous in a large mixing bowl, which I then covered with a lid. While the couscous was doing its thing...
  5. I minced the remaining half of the onion really fine and sautéed it in olive oil over very low heat, allowing it to get really soft but not brown. While it was heating up I minced the remaining 2 garlic cloves and added those in too. 
  6. When the onion and garlic were done, I chopped up the olives and sun-dried tomatoes, picked the leaves off of the parsley and mint stems and chopped them up finely. Then I added the onion, garlic, olives, sun-dried tomatoes, pine nuts, parsley, mint, and the crumbled feta cheese, to the couscous. I mixed everything up with a fork and seasoned with juice of half the lemon, some lemon zest, salt and pepper.
  7. I cut the bell peppers in half lengthwise and removed the seeds and the white foamy bits on the inside with a spoon (mostly my fingers to be honest.) Then I stuffed them with the couscous mixture and lay them over the veggies on the roasting pan. I wrapped everything in aluminum foil and put it in the oven!
  8. It was in the oven for about 45min and then I removed the foil and allowed it to cook for another 20min. uncovered.
  9. My house was filled with the most divine, citrusy-peppery-feta-cheesy smell EVER as I took the time to wash up the dishes and watch some TV...


This experience has taught me a few things:

  • Pine nuts are amazing little things. I have not often cooked with them, except in the odd pesto sauce when I am feeling inspired (which is not often), but these little guys were an AMAZING complement to this dish. Their nuttiness was a great addition to the flavor but, more importantly, their texture did wonders for this dish, which can be a little mushy otherwise! If I ever make stuffed bell peppers again, even if I am not following this recipe, I will try to add some kind of nut to the dish, for the crunch :)
  • I have totally undervalued thyme in my cooking. This zesty, lemony little herb deserves more of my attention! I will try to get some for my herb garden, so I use it more often.
  • If there was one thing that could be improved, it was the fact that a lot of water was left in the veggies... I like my roasted veggies a bit dryer, so I would uncover them a little earlier next time, to dry the dish out a bit more.
  • More roasted garlic in my life, please! The soft, white garlic, slipping out of its silky skin with the slightest pressure from a knife or fork, YUM! I hadn't added this to my roasted veggies in way too long and it's time to bring it back!
  • I remember the value of recipes! Even if I don't follow this to the letter ever again, I learned a lot about combining some of these mediterranean flavors and ingredients, and feel more confident I can make something awesome on my own next time ;)


Hmmm... my plate was full and now it's empty :D

Monday, September 3, 2012

Luscious Labneh (aka Yogurt Cheese)

Labneh is one of my favorite things in the world. The addiction started at the end of high school, when I dated a Lebanese boy whose family always had this at home. When I headed to college, our relationship ended but Labneh has stayed with me.
I like mine with some ground black pepper and drizzled with olive oil!

My labneh has been a huge hit at parties and events as a dip, served with good bread and crackers, drizzled with olive oil. If you are feeling ambitious, you can pretty it up with olives, dried fruit, nuts and fresh herbs.

This delicious and easy to make "cheese" is really just plain yoghurt that has been strained of its watery part to make it thicker. How long you strain for determines the consistency, and it is totally up to you how solid you want it.

Obviously then, the first challenge is obtaining good plain yoghurt. If you live in the US this is easy since there are billions of brands to choose from, depending on your price range and preference for free range, organic, etc. cows. If you live in China you might be better off making your own yoghurt like I do (refer to earlier post for how to do this!)

Instructions:

Mix about 1 teaspoon of salt into 1 liter (around 4 cups or 32 fluid ounces) of plain yoghurt (this is optional and I often skip it and just add some salt when I want to eat the cheese. If you just want a thicker consistency, e.g. Greek Yoghurt, you won't want to add salt!)

Take a large colander and cover it in a cheese cloth or other appropriate cotton cloth. My Lebanese friends taught me that you don't really need to buy "cheese cloth" per say; as long as the cotton is clean and not too loosely woven, even a pillowcase will do!

Colander

Colander covered in cotton cloth, in large bowl.

Place the covered colander inside a large bowl, where the watery part of the yoghurt can drain into. Try to make the cloth a little taut, so it is not sagging into the colander. This will help the yoghurt to drain. You can do this by tying a string or elastic band around the cloth and colander.

Pour your yoghurt into the cloth, and cover. You can improvise with a lid like I did, or just use plastic wrap.

Yoghurt in cloth, before draining

I have a little saucepan whose lid works well for this!

Place it in the fridge and allow the yoghurt to drain for a few hours. I usually leave mine overnight for around 10-12 hours, which makes it about as thick as cream cheese, though much lighter and easier to spread.

If you leave it for just a few hours, maybe 2-4, you will have a thick (Greek-style) yoghurt that you can use in dips, etc.

If you need to keep it longer than 4-5 days, let it drain longer (around 24 hours) so it is thick enough to be rolled up into little balls. Then you can put those in a jar and cover in olive oil. (I never do this since I go through mine way too fast!)

My labneh, ready to enjoy!


Saturday, September 1, 2012

Simple Steamed Broccoli

This is super simple, but for people who don't like veggies unless they are either fried or smothered in cheese/cream/oil/mayo or something else of that sort, this simple dish is how I converted my little sister, back in the day.

Green Goodness!


Broccoli is so delicious all by itself that there is no need for much else. The biggest broccoli crime is overcooking, so here's how to get delicious broccoli that is cooked just right and still looks green and retains some crispness:


  1. Wash and cut up the broccoli so that you preserve the natural florets. 
  2. Wash and chop the broccoli stems, too, even the big thick one! So many of the vitamins are in the stem and I swear I am being honest when I say it might be my favorite part of the broccoli -- it is crunchy, flavorful and just awesome.
  3. The thick stem and some of the bigger florets can be quickly peeled. Removing this thick outer layer makes the stems less fibrous and tough, and you will enjoy them a lot more.
  4. In a small pot or saucepan, put about one centimeter (approx. half an inch) of water, a teaspoon of salt, about one tablespoon of olive oil and some minced garlic (about 1-2 cloves should be enough). Add red pepper flakes if desired, and bring to a rolling boil (since there's not much water, this should not take long!)
  5. Once the water is boiling, add the broccoli and cover tightly. The broccoli will not be covered by water; it will be steamed and absorb the flavors of the good stuff you put in there.
  6. The broccoli will be DONE in 3-5min -- do NOT overcook it! 3min is pretty crunchy, 5min is more well-cooked but still a bright green with some crunch ;)


This should be delicious on it's own, or you can add a bit of olive oil and/or some soy sauce, depending how you want to enjoy it.

This will keep for a few days in the fridge and can be eaten cold, used in salads, etc.

I swear this simple recipe is delicious, healthy, and a great way to get reluctant veggie eaters converted ;)


Tuesday, August 21, 2012

Fancy a Rugula?

I have been getting home really late. Mostly it's because I have been going to Yoga class in the evenings, and by the time I bike home, sweaty and exhausted, I am really not up for much cooking or much heavy eating for that matter.

Getting creative with salads can help, since they make for light, healthy and quick late-night meals!

Spicy arugula, creamy mozarrella, flavourful tomatoes and the crunch of walnuts! Yum!

The ingredients for this salad included arugula, fresh mozzarella cheese, sundried tomatos and walnuts! These ingredients go so well together, and the gourmet feel of the salad makes the meal and indulgence even though it's very light.

I seasoned mine with salt, ground black pepper, balsamic vinegar and olive oil. Yum!

Friday, August 17, 2012

Delicious Beetroot and Avocado Salad

This is a simple and delicious recipe that makes for a healthy yet heart lunch!

I peeled some of the beets I had roasted, which was super easy since the skin just slips right off. They went straight in my little bento box!

Beets in the Box!
I then cut up an avocado into cubes and added it to the beets. I find that the easiest way to do this is to just slice the avocado in half, remove the pit with a knife and then slice into the fruit while it is still in the skin. Then I just use a soup spoon to scoop it out!

This avocado was just the right ripeness, from the Avocado Lady with love :)
I added a pinch of salt, the juice of half a lime, a drizzle of olive oil and a dash of black pepper. The lime adds some delicious zest and also stops the avocado from getting all brown.

I also added a tiny bit (about one tablespoon) of chopped red onion for a little extra oomph! It is a great way to offset the sweetness of the beets and the creaminess of the avocado, but I add only a little since I am afraid of having stinky onion breath for the rest of the day!

Sometimes I also like to add some plain yoghurt to the salad, but I was out and it tasted wonderful just the same! The salad was delicious and very filling; I ate it with pita bread :)

I know it might not look too pretty, but it was delicious and filling, I swear!

Total prep time: about 10min (assuming the beets are roasted and ready!)


Tuesday, August 14, 2012

On Hot, Hot Days...

Sometimes you just need to eat something cool, cool, cool. Like a fresh salad :)

My seasonings of choice are always just salt, good olive oil, and lime and/or balsamic vinegar with a dash of ground black pepper!

Lettuce, arugula, tomato, carrot, radish, cucumber and red bell pepper tossed in olive oil, balsamic vinegar, salt and pepper -- yum!

Tuesday, August 7, 2012

A Light Dinner for the Rained In: Caprese Salad

I rushed home from work last night due to the imminent threat of Typhoon Anemone, which was zoning in on Shanghai last night... Found myself at home with little to eat since I have not been to the market yet this week (sheer laziness, and also I had some leftover fresh produce from last week), and I wasn't really feeling the urge to cook anyways.

A light summer salad seemed like the meal of choice, and the fresh mozzarella cheese I had bought at the Avocado Lady's stand a few days ago beckoned to me from the fridge. Summer is the season of succulent, vine-ripe tomatos, and my basil plant has been yielding some fresh, fragrant leaves recently that I just have to make use of! A caprese salad seemed like a no-brainer!


Caprese Salad: fast, easy, light and delicious!


Caprese Salad Recipe:

  • Fresh, ripe tomatos, sliced
  • Fresh mozzarella cheese, sliced
  • Fresh basil leaves
  • Olive oil (the good kind!)
  • Salt
  • Cracked black pepper


How to:

  1. Slice the tomatos onto a plate
  2. Slice the mozzarella and place the slices over the tomato slices
  3. Place basil leaves over the mozzarella
  4. Add salt and pepper to taste
  5. Drizzle liberally with good olive oil


Enjoy!

Prep Time: 2min


The Avocado Lady

The Avocado Lady is a creature of legend among Shanghai expats, and a not so secret secret that everyone should know. If you live in Shanghai and you don't know the Avocado Lady it can be said that you do not really live in Shanghai, you merely exist here.

From the outside, the Avocado Lady's little produce shop looks like the myriads of other little local businesses!

The Avocado Lady is your one-stop shop for all sorts of produce that is hard to come by here in Shanghai, and China in general. While an increasing number of fancy foreign supermarkets have started supplying a lot of what this magical being has provided for years from her humble little shop, no-one can beat her prices!


It is a mystery to me to this day how and where she manages to source her imported products for so cheap (small, family-owned businesses usually find it hard to compete with the likes of Carrefour and Walmart when it comes to price!), or where this entrepreneurial woman got this wonderful idea in the first place.

She stocks hard to come by produce such as beets, radishes, arugula, nuts, fresh spices and cheeses and, of course, avocados, which she sells at the cheapest price I have ever seen in China.

On top of the produce, she also stocks an ever increasing array of imported goods such as wine, olive oil, jams and marmelades, breakfast cereals, canned goods... and on and on!

Inside the store, the shelves are laden with foreign goodies and fresh produce!

I came home on my bike the other day, my little basket heavy with the delicious things I picked up. I generally buy my regular veggies closer to my house, but for special things I simply cannot find at my regular produce stand, the wonderful Avocado Lady saves my day!

Beets, avocados, almonds, walnuts, arugula, radishes, olive oil, fresh mozzarella, coconut milk, cream and canned tomatos were some of the spoils from my latest visit to the Avocado Lady!
The Avocado Lady's shop is in Shanghai's French Concession at 274 Wulumuqi Rd, near Wuyuan Rd. The closest metro is the Changshu Rd. stop on lines 1 and 7.

In Chinese: 乌鲁木齐中路274号,靠近五原路。